
Tips for Creating Clean Canvas Embroidery
I got into embroidery about two years ago when I made a couple of shirts for Alex and I before a trip to Disney. It’s actually pretty easy to get started with embroidery! The thread is also really cheap and craft stores have so many to choose from.
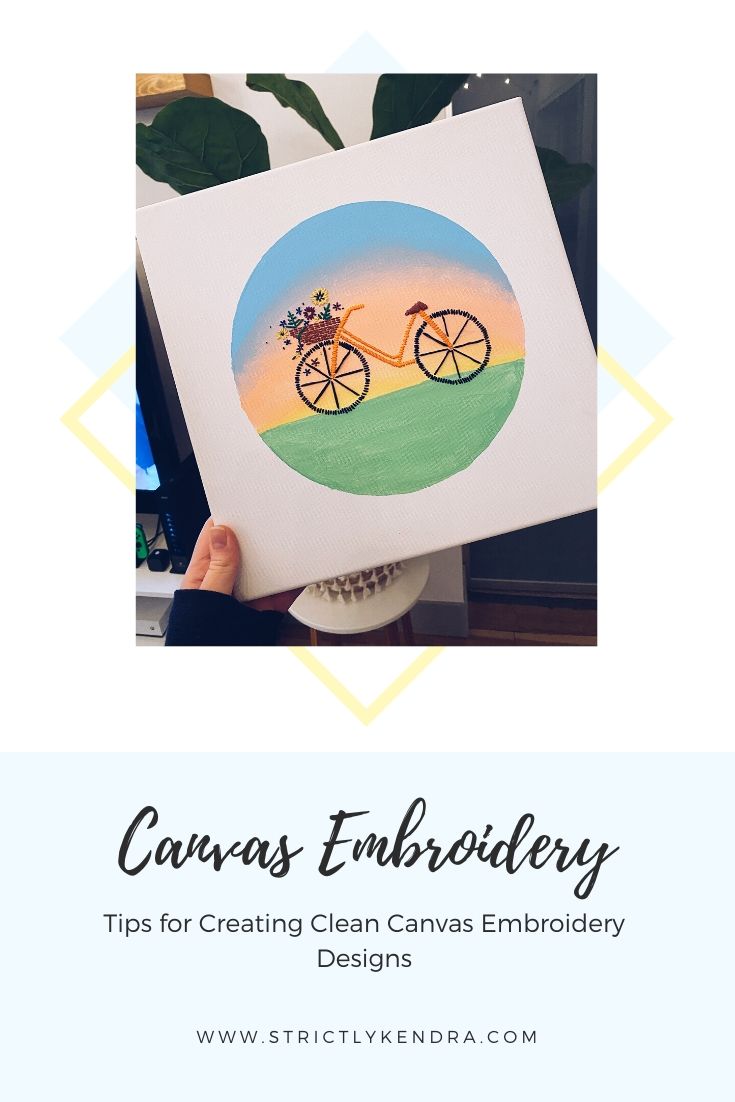
During a sale at Michael’s, I got about ten of these square canvases. Since I have so many, one day I tried embroidering a canvas and it was similar to using fabric! I love combining the two now because it adds a 3D element to flat paintings. It’s a little more difficult to embroider canvases, so here are some tips!

Watch where you put the embroidery holes
Since canvases are stiff and tearable, it’s important to watch the hole spacing. If you put them too close, it’s possible to make one giant hole or tear the canvas altogether. You can put the holes close together, but when making things like flowers, be extra careful.

Similarly, don’t put multiple threads through one hole. You can do this with fabric, but it puts too much stress on canvas and can cause tears. There’s no flexibility with canvases so you have to get creative sometimes.
Don’t pull too hard
Be mindful of how hard you’re pulling the thread through the canvas. Again, it can easily tear if you handle it too roughly since the canvas isn’t flexible. I’ve definitely pulled too hard before and caused a slight tear or the hole ended up larger than I intended.

Although canvases are sturdy, they’re more delicate than fabric and have to be handled more carefully. Make sure that there are no tangles in the fabric since that can cause you to pull too hard trying to get the thread through. I tend to make my thread too long so tangles inevitably happen and I’ve wasted so much time getting them out!
Sketch your embroidery design first
The great thing about canvases is you can sketch out your design so easily, and erase it if you don’t like it. You can definitely do this with fabric, too, but it’s a lot easier on canvas. Take advantage of this! Even if there’s already paint on the canvas, it’s super easy to lightly sketch over the top.

I’ve tried freehand embroidery on canvases before and it doesn’t turn out as well if I’m following sketches. I like to figure out the spacing, like with the bike video above, and it tends to look messy. The only things I freehand are small details, like flowers and polka dots.
Try not to back out of the embroidery holes
With fabric, you can easily back the needle out and make a different hole. You can’t do this with canvases since it’s rigid and the canvas won’t “go back” into its original form. Once that hole is made, you have to stick to it unfortunately.

If you absolutely must move the hole, you can try to “pat” the canvas back into place, and even put some paint over it to try and hide the mistake. You can also place the hole where the embroidery thread will cover up the mistaken hole. There are ways to cover up mistaken holes, but it’s harder than regular fabric embroidery.
Good luck!
Canvas embroidery is so much fun and you can produce beautiful results. Over time, your lines will get cleaner and your embroidery will be spaced out well. Search Pinterest to find design ideas, and embroider away!