this is a page for

Category: DIY

DIY

How I Stay Creative While Working Full Time

Since graduating college and starting my full time gig almost two years ago, I’ve struggled with finding time to be creative. While I don’t have assignments to do in my spare time, work is exhausting in other ways, and it’s difficult to motivate myself to work on projects.

After a couple of months of this, though, I definitely started to feel the lack of creativity in my life wear on me. I decided to purposefully and mindfully make time for creative tasks. Just by changing up a few things in my routine enabled me to fit in time for creativity, and helped provide an outlet from the stress that comes from a typical 9-5.

Make it easy to get to your DIY supplies

Most of my DIY supplies were put away in boxes under my bed or closet to save space in my apartment. My boyfriend and I re-organized our space about six months ago and I made sure I could easily get to my supplies, which helped tremendously.

I keep my most used DIY/creative supplies on this shelf so I can get to them quickly!

I can now see my most used supplies just by walking in my room, and it motivates me to create more. We also got a lot of cool shelving to help organize my supplies, which double as decor. My boyfriend is a huge fan of functionality so it was a good compromise!

Use things like Pinterest or Instagram to stay inspired

I constantly look at Pinterest for new ideas, and it’s great at giving me ideas for projects. Not only can you get inspiration, but you can also learn new techniques. You can have just one board dedicated to projects, or different ones depending on the mediums you like to use.

Using Pinterest and Instagram for inspiration is a great way to stay creative!

Instagram is also great for quick inspiration, but it’s not as easy to save ideas for projects. I also look at Etsy or other online stores for inspiration! There’s really no limits with finding inspiration for projects on the internet.

Take classes to learn new creative techniques

I touched on this a little bit earlier, but it can be great to learn with hands-on experience. This is a great way to learn more about different mediums and get inspired by other people! I got my boyfriend a glass blowing class for Christmas (that I joined in on), and it was so cool learning how to work with a completely new material. Especially since it’s not something you work with everyday!

Pottery classes are on my list to take, I’d love to add it to my list of creative techniques!

Just search for art classes in your area, and you’ll find tons to choose from. Groupon is also a great website to look at because you can find great deals on there!

There are also a ton of online classes to take, and YouTube is a great resource to learn virtually any creative technique. You don’t have to leave the comfort of your own home to learn new ways to be creative!

Write down new project ideas immediately

I have a bullet journal that I use to keep track of my schedule and also my ideas. Anytime I have a remotely good idea, I write it down so I can come back to it later. Once you start writing ideas down, it’s a lot easier to get the ball rolling. Ideas often come in pairs, trios, or groups, so get them all down on paper!

Physically writing things down helps you remember them – it’s my preferred method to stay create!

You can also just keep a running note on your phone if you don’t have a planner, or don’t have it with you. I do this all the time if I’m out without my bullet journal, and just add to it when I get home. If you’re anything like me, it’s really easy to forget ideas, so make sure you have them down somewhere!

Plan time to be creative

I know this doesn’t sound very glamorous, but sometimes you just have to plan the time for projects. Dedicate a certain time of the day, week, or month to being creative! Don’t move that time for anything else, and use it to focus on making something that you love. Once you start to consistently schedule in time to be creative, it quickly becomes a habit.

Planners are not only great for tasks, but also your creative time!

Planning time for creativity also helps you plan for what you want to do, so you aren’t stuck without the supplies you actually need for a project. I’ve been in that situation and it’s extremely frustrating!

Most importantly…

….stay creative! It sounds like simple advice, but try and be creative as much as possible. Once you start making things, it’s easier to keep the ideas flowing and your motivation up. It’s natural to get into a creative rut, but don’t stay there.

What are your favorite ways to be creative?

DIY

Tips for Creating Clean Canvas Embroidery

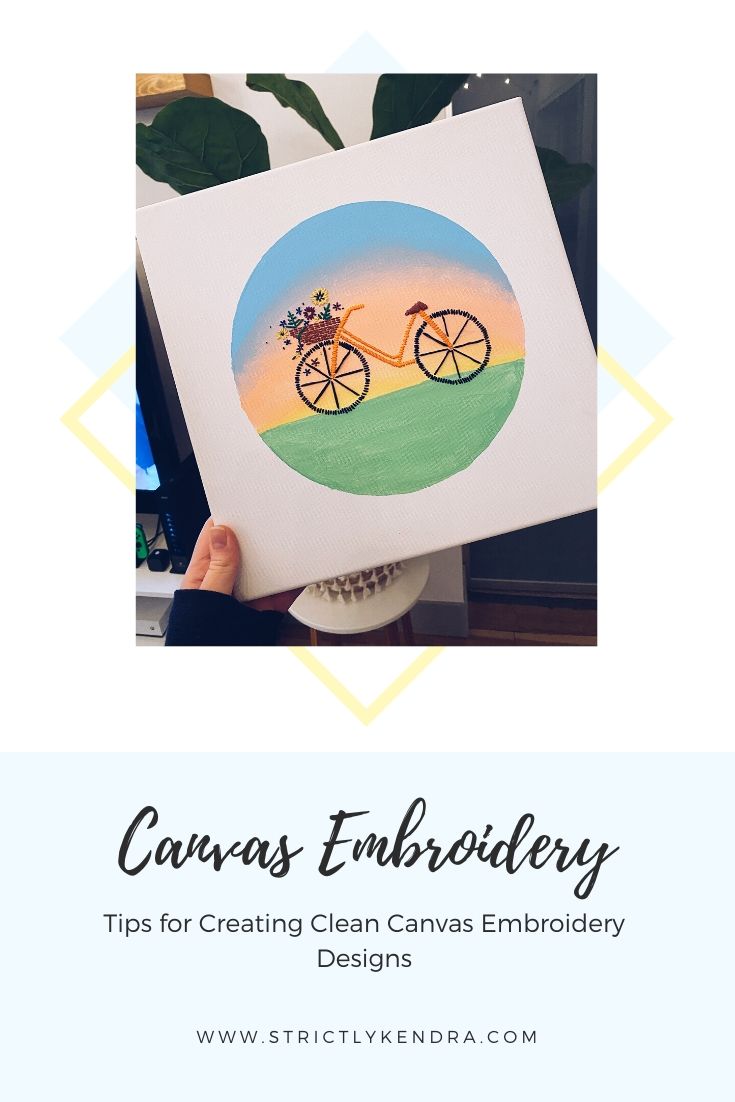
I got into embroidery about two years ago when I made a couple of shirts for Alex and I before a trip to Disney. It’s actually pretty easy to get started with embroidery! The thread is also really cheap and craft stores have so many to choose from.

During a sale at Michael’s, I got about ten of these square canvases. Since I have so many, one day I tried embroidering a canvas and it was similar to using fabric! I love combining the two now because it adds a 3D element to flat paintings. It’s a little more difficult to embroider canvases, so here are some tips!

Watch where you put the embroidery holes

Since canvases are stiff and tearable, it’s important to watch the hole spacing. If you put them too close, it’s possible to make one giant hole or tear the canvas altogether. You can put the holes close together, but when making things like flowers, be extra careful.

The spacing here is super important, especially in the back so the front looks neat!

Similarly, don’t put multiple threads through one hole. You can do this with fabric, but it puts too much stress on canvas and can cause tears. There’s no flexibility with canvases so you have to get creative sometimes.

Don’t pull too hard

Be mindful of how hard you’re pulling the thread through the canvas. Again, it can easily tear if you handle it too roughly since the canvas isn’t flexible. I’ve definitely pulled too hard before and caused a slight tear or the hole ended up larger than I intended.

Make sure to try and keep the thread nice and straight like the photo here, to avoid knots

Although canvases are sturdy, they’re more delicate than fabric and have to be handled more carefully. Make sure that there are no tangles in the fabric since that can cause you to pull too hard trying to get the thread through. I tend to make my thread too long so tangles inevitably happen and I’ve wasted so much time getting them out!

Sketch your embroidery design first

The great thing about canvases is you can sketch out your design so easily, and erase it if you don’t like it. You can definitely do this with fabric, too, but it’s a lot easier on canvas. Take advantage of this! Even if there’s already paint on the canvas, it’s super easy to lightly sketch over the top.

I sketched out the entire bike so I’d know how to space the thread out!

I’ve tried freehand embroidery on canvases before and it doesn’t turn out as well if I’m following sketches. I like to figure out the spacing, like with the bike video above, and it tends to look messy. The only things I freehand are small details, like flowers and polka dots.

Try not to back out of the embroidery holes

With fabric, you can easily back the needle out and make a different hole. You can’t do this with canvases since it’s rigid and the canvas won’t “go back” into its original form. Once that hole is made, you have to stick to it unfortunately.

Be confident with your hole placement – there’s no going back!

If you absolutely must move the hole, you can try to “pat” the canvas back into place, and even put some paint over it to try and hide the mistake. You can also place the hole where the embroidery thread will cover up the mistaken hole. There are ways to cover up mistaken holes, but it’s harder than regular fabric embroidery.

Good luck!

Canvas embroidery is so much fun and you can produce beautiful results. Over time, your lines will get cleaner and your embroidery will be spaced out well. Search Pinterest to find design ideas, and embroider away!

Why I Started a Bullet Journal + How to Start Your Own!

It’s no secret that I’m a huge fan of organization, and that I have a mild obsession with my planner. I’ve been seeing bullet journals around Pinterest and Instagram for a couple of years now, and I really don’t know why it took me so long to start one. I decided to finally check into them more, and hours on Pinterest and YouTube later, I had ordered a journal and some notebooks.

I hadn’t known that bullet journals were not only planners, but actual journals as well – silly, I know. I personally have (or had, now) a planner, a separate journal for my thoughts, and another journal for goals/ideas. Obviously I couldn’t carry around all three, so I’d usually just carry my planner around with me. My phone is full of notes and ideas since I didn’t always have my “ideas” journal with me, so it would result in a lot of lists later that I couldn’t really make sense of.

With my bullet journal, I can have designated pages that are solely for lists and ideas, or anything else I’d like to put in there. I really like the creative freedom you can have with bullet journals, and that you can follow the system loosely and make up your own rules. I’ve found it’s been great to sit down on Sunday afternoon and figure out the week ahead, and see what all I have to do. It’s quickly become a part of my weekly and daily routine to set up the week on Sunday and get ready, and then come back after work and update my journal.

Another part I love about bullet journaling are the different “trackers.” Currently I have a habit tracker and mood tracker, and I think next month I’ll add in an expense tracker, too. Visually checking in with my goals for the month and year has been helping so much in keeping myself accountable, and it’s cool to see them fill in. I love filling in those little boxes, so it keeps me motivated, too! This has also been great in setting realistic goals, and also seeing where I can push a little more to set a higher goal.

So far I’ve been keeping my journal relatively simple, but I’m excited to become more creative in the future. I love drawing and painting, so my bullet journal will be a great place to be able to do that in, since I don’t have a whole lot of time to dedicate to that. I really love how you can get super creative and elaborate with bullet journals or keep it simple if you like!

How to start your own bullet journal

I just want to first say that I’m still a beginner at this – so take what I say with a grain of salt! These are just the tips I’ve picked up from all the reading and watching I’ve done about bullet journals. It’s really daunting to set up your bullet journal at first because there’s so many photos out there of really elaborate journals, but it isn’t as difficult as it looks! 
Start with a key


I saw a couple of people do this, and it’s been really helpful! Putting the key on some thicker paper and then taping it into the inside of the cover has been really useful to have it on whatever page I’m on. The actual bullet journal system is easy once you get the hang of it, but it can be a tad confusing at the beginning. I mixed up the “event” and “task” bullet a lot in the beginning – I still do – so this has been really helpful in remedying that.
Move onto the future log


The future log is really important for your bullet journal, because it allows you to see the year at a glance and write in important events. So far I’ve mainly written down birthday’s and holiday’s, but as time goes on there’s more and more to put in the log. I added little doodles for each month to give it some personality, too!

Then, of course, you’ll need an index


This is really self-explanatory, but the index just helps you keep your journal organized. It’s important to keep track of all of the pages so you can come back to important ones, or yearly logs. With the journal I got, the index is already in there, which is super convenient. I left a couple of pages after the pre-made ones just in case I need more, since I’ve heard people run out of space.

Put in any yearly logs you want, or anything else you’ll want to come back to a lot


For these I put in my half-yearly goals and the books that I want to read this year (I still have to integrate these from my good reads account), since I know I’ll be referencing these a lot. It was really nice that I started my bullet journal in July since it means I have an even six months left in the year, and I was able to check in on the goals I set for this year. A lot of people put in pages like “movies to watch” or “things to keep track of,” but you can really put whatever you want. It’s your journal!
With that, here’s my first monthly spread!

I decided to go with a vertical calendar for the month, which was really nice to keep track of my personal life and blog/YouTube stuff, but I did find myself wanting a larger calendar so I had a more wholistic view of everything. Honestly, I’m a calendar junkie so I should’ve known better that I’d be missing it.

Next are my monthly goals and stats. I really like this page since both sections are based around goals, but I feel like I can fit in a third section to fill up more space, whatever that might be. I’ll play around with it next month and see what I’m feeling!

Then we have the trackers, habits and mood. I saw so many people do this, and I love the idea! I’ve been keeping myself so much more accountable because I actually have to track these things on the daily, so I’m much more motivated to follow through with them. The mood tracker is also really cool so I can see how my emotions fluctuate throughout the month depending on what happens in a day.


Finally, in the initial July pages, is the idea page. I intended for this page to be for whatever I was feeling or thinking about, but it actually really is just an idea page, which I both like and dislike. I think for August I’ll turn it into a “brain dump” page, so I feel like I can write more than ideas for blog posts and videos. We’ll see how it goes!
Now time for some of my weekly spreads!

This was my first weekly spread with some little daisy detailing at the bottom. I really loved how the bottom turned out, I thought it added something really cute to the page since it was so blank at first! Like I said earlier, I was trying to keep this month pretty simple, so I didn’t want to go to crazy on the daisy theme. I think less ended up being more this month!

This was my second weekly spread, and I decided to put a little calendar in the corner this time, and I really ended up loving that. I didn’t have to keep looking at the calendar in the future log or on my phone to see a whole view of the month, so it was really nice. It was really quick and simple to do, and added something to the blank corner under Sunday.
Here are some extra pages I added in for the summer!

I wanted to put in a summer bucket list so I could try and actually do some fun things this summer other than work. the title is simple but super cute, and I’m really happy with how it came out! The banner reminds me of the lanes in Brighton when I was studying abroad last summer, and I love the baby blue.

Here’s a closer look! I plan on continuing to add things to the list and (hopefully) checking them off, so we’ll see how it goes!

Just as I want to make sure I do things this summer, I also want to track what makes me happy! I actually ended up added some yellow to the “happy” to make it a little brighter, but overall I’m happy with how simple it is. I want to make sure I’m really present this summer in everything I do, as well as grateful for all of the great things that happen.


These are some of the supplies I’ve been using

I really love this Signo Uni-ball pen! It comes in a pack of three which is really great, and is only $6 so it’s a great deal. This is useful for covering up any little mistakes I make, and it’s also fun to make a little black box and put white text over it to change it up!

I’ve had this Tombow brush pen for a while now, and I love it so much. This one came in a pack of two: one “hard” tip and a “soft” tip pen. It’s really nice that there’s two different pens for some variety, and to use them for different things! 

Sharpie pens have been my go-to pen for years now. I love how fine the tip is and how dark the black is – it’s great for writing small block letters, or adding fine details to drawings or paintings.

I got these washi tapes at Target for around $3 each, and I really love them! They’re different from the regular floral ones (which, don’t get me wrong, I love), so I thought it would be cool to switch things up!

I got these Tombow dual brush pens for my birthday back in April, and they have quickly become some of my favorite art supplies. I’ve been using them like crazy to make cards, and they’ve come in handy just for coloring, writing, and everything in between!

I’ve seen so many people use these Crayola Supertips for their bullet journals, and now I understand why! The 50 pack was only around $10, and all of the colors are so pretty. I love the variation in them, and they’re really great for adding some color here and there throughout your journal. The lighter colors are also great for more subtle colors, too!

And of course, here’s the actual journal that I’m using! I’m so happy with this journal, the pages are thick, and it’s great that there’s already an index in the beginning. The pages are also already numbered, which is really convenient. I haven’t added anything to the cover yet, and I honestly I might just leave it black. I haven’t decided yet!
Alright, that’s that for all of my tips, how to start a journal, and all the supplies I’ve been using! You can watch the video I did on this topic right here! I go more in depth through my spreads, and talk about them a little bit more. Plus, it’s just nice to see a flip through.

I’m so glad I finally decided to start a bullet journal, and that I get to share what I’ve done in mine so far! I’m super excited to share monthly “plan with me” posts and videos, so be on the lookout for that. I actually am in the process of filming my August Plan with Me, which will hopefully be up in a couple of days.
I also decided to finally start a monthly newsletter, so if you want more updates from me, go ahead and put in your email at the top of my blog! I’m not sure when exactly I’m going to be sending those out, but I think it’ll be early in the month, or a couple of weeks in. This is all still new, so it’s a work in progress. Thanks for coming along with me, and thanks for reading a watching! 🙂
Do you have a bullet journal?

Have a great day! 🙂

This post contains affiliate links.

College Apartment Tour! | Christmas Edition

A lot of you probably know that I moved into an apartment this year for my junior year of college. I couldn’t be happy, especially since I was pretty much done living in the dorms! Don’t get me wrong, they were super nice to be in for my first two years of college, and I ended up meeting some of my best friends, but I really missed having my own kitchen and all of the other benefits that come along with living in an apartment (like actual rooms…). 
As soon as I knew I was definitely going to be living in an apartment, I made a board on my Pinterest so I could keep track of all of the decorations I wanted to put up, and other organization tips. Moving in was stressful, and it took way too long to decorate – procrastination on my part – but I finally have up all of the decorations I want, so I thought it would be fun to show you all how it turned out!
I thought the most simple way of doing that would be to post the video I made about it on my channel, since I basically walk you through it! Here are some highlighting photos, though, of some of my favorite things!

I’m so happy with how my apartment came out! It’s really nice being able to have my own space – shared with roommates – that we can just come home to at the end of a long day filled with classes and work. My roommates and I honestly don’t really want to take down all of the lights even after Christmas is over because they make it so cozy in the apartment! Maybe we’ll swap them out for white lights, but for now the colors are super festive and give it such a warm feeling.
Thank you so much for reading and have a wonderful day! 🙂

DIY Crescent Moon Dreamcatcher

I have been on Etsy so much lately looking at room decor, and everything else really. You can find some really adorable things on Etsy, and it’s super fun to just browse around! While I was looking the other day, I came across a really cool crescent moon dreamcatcher. I have always loved dreamcatchers, and have had a lot through the years. When I saw this one, I knew I wanted to make one like it! I absolutely love DIY-ing, so I really wanted to make one rather than buy it, especially since I knew I could simply make one myself.

I made a video about this on my channel, and I definitely recommend watching it if you make it, since it’s usually easier to follow along with video instructions!

Here is all that you will need for this DIY (side note: I got everything from Michaels just to keep this easy! This post is in no way sponsored by them, however!)

I used the twine to wrap around the metal loop, and the mini rope to make the long strings that hang off of the dreamcatcher.
I used these metal loops for the base of the dreamcatcher, which my dad cut down for me to create the crescent moon shape. You could also use these wooden ones if you’d like!

How pretty are these feathers?! I saw them and knew I had to use them for this DIY.

I also got these feathers since they are nice and fluffy and large. I also like the natural color that they add to the dreamcatcher since a lot of the pieces are white!

Here is the metal rod cut to the crescent shape!

I have been obsessed with Michaels stone and crystal collection they’ve had in the jewelry section! Everything is seriously so gorgeous, it was so hard to choose which crystal pendants to get. I have this really nerdy rock collection, so the inner rock geek in me was crying when I saw all of the stones.

I got this really pretty shimmery embroidery floss for the web part of the dreamcatcher, and I think it ended up looking so cool! I love how it’s basically a dark copper color, and it really added a cool dimension to the web, especially since they can be kind of bland sometimes.

Here’s a nifty action shot of my dad cutting the metal. He was very proud of himself for making it on the blog, ya’ll (he didn’t realize he wasn’t actually in the shot…poor guy).

These are the little clippers my dad used to cut the metal!

Let’s get started with the actual process:

To get the beginning of the twine to actually stay on the metal, I used a hot glue gun (I completely forgot to take a picture of it, sorry!) to glue the end of the twine down. After it was dry and the twine was secure, I went ahead and started to wrap the twine tightly around the metal.

I first quickly wrapped the twine, and then went back and pushed it all together more.

Once I hit the end of the metal, I did the exact same gluing process as the beginning!

For the strings that hang down, I decided to do slip knots. I first pulled off how much I wanted from the spool, and then doubled it back up it’s length so both sides where the same size. After you have one long string folded in half basically, grab just below the part where it is folded in half.

Fold the loop back behind the base (the metal rod covered in twine).

Put your fingers through the loop, and pull both lengths completely through the loop.

This is how it should look after you pull the whole thing through the loop.

Tighten up the knot, and situate it how you want!

Keep going until you have as many knots you want! I went for eight in total.

Okay, now time for the web! This is the time I definitely suggest watching the video to see exactly how this is done. I completely forgot to picture this on the first “layer” of the web, but it’s exactly the same process. To start it off, wrap the string around the base about five times, or however many you think it takes to anchor it tightly, and tie it off. So take the tale of the string and fold it to the right of the base, or in this case the second “layer” of the string.

Pull the tale over the second layer. You will see a kind of loop form, especially if you are on the second layer.

Pull the whole tale back through the loop.

Pull it tight, and make sure to try and keep it tight to make the next layer! I found this whole process to be pretty tricky at first, so you just have to remain patient, and it may take you a couple of tries to get it down. I had to start over completely twice! My web definitely isn’t perfect, but I like how it looked, anyway. After you are done with the first layer, flip the whole base over so it mirrors how it was initially, and just keep going through the same process over and over, in order to get the number of layers that you want. I believe I did four! After you are done with the final layer, take whatever tail you have left over, wrap it around the end of the base and tie it off!

Now it’s time for the fun part – decoration! My parents had this copper wire hanging around that I decided to put around some of the string (you can also find this at stores like Home Depot if your parents don’t just happen to have some haha), and I absolutely love how it turned out. To keep the feathers on, I hot glued them to the strings, and tied the string around them to make it appear as though I had tied them on rather than glued them on.

Here’s how everything turned out! I love how the gold feathers look with the more natural ones.

The crystals really add a lot as well!

I couldn’t be happier with how this dreamcatcher turned out!
You all know how much I love DIY’s, and this one was so much fun. I really hope you guys make this, and if you do, let me know on Instagram and Twitter!
Thank you so much for reading, and have a wonderful day! 🙂

How To: Decorate a Small Space for Christmas!

Decorating for Christmas is one of my favorite things to do, so I thought I would share how I decorated my dorm for Christmas! I’m back home now for winter break, but I’m so glad I decorated my dorm for Christmas, because it really got me into the holiday spirit, and allowed me to get through finals sanely!


1. Get festive pillows and put them on your bed, couch, etc.
Christmas pillows are always so pretty, and there are so many to choose from! I love to go to Michaels to get them because they have a lot, and they also have a lot of coupons you can use! This makes the cost of the pillows go down a lot, and also allows you to get a lot!

2. Get a mini-Christmas tree
I found my little Christmas tree in the dollar section of Target (it was $3), and later found the little ornaments for $3 as well! I had the little firefly lights already, but I know Target has some for super cheap as well. It’s super easy to find really cute and small Christmas trees that don’t cost a lot, and also won’t take up a lot of room in your small space! It was also super fun decorating it, even though it didn’t take that long at all.

3. Make a cute Christmas banner
I found a little kit at Target (I promise this isn’t sponsored by Target!) with gift tags and a bunch of twine. Instead of using the trees as gift tags, I decided to make a little banner out of them and put them by my desk! It was super easy to do, the kit was $3, and it looked so cute once I hung it up! This would also be really simple to do with simple construction paper and twine if you can’t find a kit like the one from Target!

4. Hang up twinkle lights. Everywhere.
I have little fairy lights in my room year-round, but they definitely feel super festive around the holiday season! You could even get some red or green colored lights to layer on top of twinkle lights already there.

Alright, well those are four, simple ways to decorate a small space for Christmas!
I can’t believe it is already time for Christmas – this year has seriously flown by. This is my favorite time of the year, though, so I’m trying to soak it all in as much as I can.
You can also check out the video I made down below, and you can see more of my Christmas-fied dorm room!

Do you like decorating for Christmas?

Thank you so much for reading, and have a wonderful day!

DIY Dorm Room Decor: Quote Canvas


With school coming right around the corner for some people, I thought it would be perfect to share with you guys a DIY that’s great for motivation. We all have those days where we feel inadequate for various reasons: a failed test, rejection of any kind, or you just feel down because of stress. I find that when I feel like this, motivational quotes, however cheesy, can really help to get me out of a slump. Making some kind of art piece with the quote is even better, since arts and crafts are so therapeutic. Does that make me sound ninety years old? Probably. But as long as it helps me stay motivated throughout the year, sign me up!

Here’s what you’ll need for this project:

IMG_2862.jpg
Some sort of paint tray (cardboard will do just fine).

IMG_2863.jpg
Either watercolor paints or acrylic paint. If you’re using acrylic paints like I did, you just have to water them down a ton, which is super easy to do!


IMG_2865.jpg
A mug, cup, or bowl of some sort to hold water.


IMG_2867.jpg
Paintbrushes of any kind.


And you’ll also need watercolor paper!


The fun part is next, because you can literally do any quote and any design you would like! I used my favorite quote, “Shoot for the moon. Even if you miss, you’ll land among the stars.” First I just used a white crayon to write the quote, and then I painted the background as a galaxy. It was really easy and I am so happy with how it turned out! Although I had to repaint the words with white paint, I’m glad I used the crayon first as a reference. Here’s how it looked before the white paint:


IMG_2868.jpg
I also added some more point after this point to darken in some areas, and I also added the “stars.” After I did all of that, it looked like this:


IMG_2871.jpg
I’m so pleased with how this came out! This is one of my favorite quotes because it really helps me when I’m feeling unmotivated. One of the scariest parts of college is the fact that your dreams may not pan out the way you thought they would; however, you should never let a “may not” or a “possibly so” keep you from trying your hardest and shooting for the biggest dream possible.


So go on and do this DIY and also achieve your dreams! This has been an nice DIY and life lesson all in one from Kendra! Let me know if you guys try this out by tagging me on social media (my handle is @stnkrbug on both Twitter and Instagram), and leave your favorite quote in the comments! 

Thanks for reading, have a wonderful day, and dream big!

DIY tumblr Inspired Spring Decor!

I love changing up my room for the different seasons, and since spring is probably my favorite (I feel like I say that about all seasons once they come around…), I was super excited to do some DIY projects to spruce up my dorm room for spring!

 All of these projects were so fun to make, and pretty easy and inexpensive! I had a lot of the items lying around the house and you probably will too!
Distressed Mason Jars

 What You Will Need:
-Mason Jars
-Acrylic Craft Paint
-Paint Brush
-Rubbing Alcohol
-Cotton Rounds
-Sand Paper (not pictured)

1. Start off by cleaning the Mason Jars with Rubbing alcohol to make sure all of the oils are off of the glass and the paint will stick.
2. Begin painting the Mason Jars with a thin first coat. Let the first coat dry completely before you put on a second!!
3. Paint on a second coat once the first is completely dry.
4. If using a lighter color, paint on a third coat once the second coat is completely dry. I had to do this with the pink since it was so pale.
5. Let all of the coats dry over night. This is very important!
6. Once they have all dried completely over night, you can start to sand them to create a distressed look. I had a 120 grit sandpaper, which I found to work great! Just go around and sand wherever you want the paint to look old and distressed, and make sure to especially sand the words so they stand out.

 The finished products!

I used them as vases when my friend got me flowers!
This project isn’t difficult, you just have to make sure to wipe the jars down with rubbing alcohol or else the paint won’t stick well, and you have to let the coats dry really well! 

Sea Glass Jars

 What You Will Need:
-Cheap plastic cup
-Milk bottles (I got mine from Michael’s)
-Elmer’s glue
-Dawn Dish Soap (any dish soap will work just fine)
-Blue and green food coloring
-Paint brush

1. Add 2 tablespoons of Elmer’s glue to the cup, and 1 tablespoon of water (it’s a 2:1 ratio if you want to change up the amount). Mix until water is incorporated.
2. Add 3 drops of blue food coloring and 1 drop of green, as well as 1 drop of Dawn dish soap. Mix until the “paint” is a nice sea-foam green color.
3. Begin painting one, thin layer onto each milk bottle.
4. Once each milk bottle has a thin layer, you are done! Just let them dry overnight and they will look like the picture below! Don’t worry if they look streaky while drying, they will dry to be a nice opaque color! I was skeptical while I was watching mine dry but they turned out just fine.

The finished bottles! I put some fake peonies in them because I thought it looked so adorable.
This project seems like it would be difficult, but it was actually really easy! I love how they turned out, and I’m so excited to change up the flowers in them!
Mini Flower Wreath

 What You Will Need:
-Small grapevine wreath
-Little fake flowers on a “vine”

1. This project is really simple and self-explanatory; just take the “vines” of flowers and weave them through the wreath! Keep doing this until you are satisfied with how the wreath looks, at which point you are done.
I think it turned out so cute, and it’s the perfect way to add some color to your room!
Alright, well those are all of the projects! I basically went on a DIY frenzy over spring break which was so much fun. I think I’m going to do a lot over the summer when I have more time! So expect a lot more hehe. You can also check out the video I did on all of these projects to see a more in-depth explanation for each one!
Thank you so much for reading, and have a wonderful day! 🙂

DIY: Watercolor Shoes

Here lately, I have been absolutely loving everything watercolor! I think it’s so pretty for spring and summer (or just anytime), and the pastel color combinations are so beautiful. Because of my newfound obsession, I decided to do DIY watercolor shoes that are “painted” with fabric dye!
I am so happy with how they turned out!! They are going to be so perfect for spring, and I can’t wait to wear them with all of my dresses and skirts! They are also so comfortable, so they’ll be a great everyday shoe.
Without further ado, let’s get into how I made these puppies!
For this project you will need:
-White canvas shoes (I got mine from Walmart for $5!)
-Fabric dye in whatever color you want
-Small plastic cups
-Painting sponges
 Mix all of the dyes by filling the cups halfway with warm water. You really don’t need a lot of dye; just enough to make the water look dark! I ended up putting too much blue dye in the water, so I just watered it down a bit!
 Here’s what my purple dye looked like.
 And here’s how the pink looked! I did have to put quite a bit more pink in the water to color it just how I wanted.
 Test out the dyes on a paper towel to make sure you are satisfied with the colors! This is very important because there is no turning back once you start to put the colors on the shoes.
 Start out by making spots with the color that is the darkest (or the one you want to be the “main” color).
 Make sure to make the dots all around the shoe, and don’t forget the laces!
 Once you are satisfied with the number of spots, start putting the second darkest color next to the first. Repeat this process until all of the first spots have little buddies!
 Using the lightest color, make spots on the other side of the darkest color. Repeat this process, and fill in with the other two colors as you feel necessary. I did leave some white space in the end, but the shoes are basically covered with color! I just repeated this process over and over until I was satisfied.
 The finished shoes!
I am so happy with how they turned out – I have been wanting a pair of shoes like this for so long, and they were so much fun (and easy!) to make!
Here is my YouTube video on how to make them – it might be a little easier to follow since you can actually see how I made them!
If you guys make these, make sure to show me on Twitter and Instagram – I would love to see them!

Thank you so much for reading, and have a wonderful day! 🙂

DIY Gold Dipped and Chalkboard Milk Bottles

It’s no secret that I love DIY projects, especially as gifts for my friends and family. I think they are so nice to give to people because it shows you like to put in a little extra effort for them, and the projects are usually so much fun! 
While Christmas shopping this year, I saw cute little milk bottles at my local craft store, and just had to do a project with them for gifts. So, I went on the hunt for gold and chalkboard paint in order to make a gold dipped (I love gold things if you haven’t noticed) milk bottle, as well as one painted entirely with chalkboard paint.
Here are the results!

They were both really easy to do, but I will include how I painted them step by step, as well as the supplies you will need!
Gold Dipped Milk Bottles

 For this project, you’ll need however many milk bottles you want to paint, painters tape, Liquid Leaf (or any other gold paint you can find, I found the Liquid Leaf at Michael’s), and a brush of some sort. If you do use Liquid Leaf, you actually need to use a paint brush with bristles, but use a cheap one unless you have a good cleaner to immediately clean off the paint, or else it will ruin the brush!
 Tape off the part that you don’t want to paint with the gold, but you don’t need to tape off the whole bottle. Just make sure the line is straight and even all around the bottle!
 I just had to take a picture of the Liquid Leaf – how cool does it look?!
Turn the bottle upside down, and simply paint! Make sure you paint in the same direction (I did up and down brush strokes) around the whole bottle. I did put two coats on one bottle, but there was no visible difference between two coats and one when I compared the two bottles.
That’s it, you’re done! Carefully take off the tape, and make sure the bottles are completely dry before you do anything with them! I think these are perfect to use a vases, decorations, or anything else you can think of to use them for. This method could also easily be used to make anything else you would want “gold dipped.” I also painted a giant seashell gold for my grandma for Christmas because she loves the beach, and it turned out great!
Chalkboard Milk Bottles
 For the chalkboard bottles, you’ll need milk bottles, chalkboard paint (you can find this at any craft store, usually by the acrylic craft paint), one of these little sponge brushes, and newspaper to put under the bottles while painting.
 Turn the bottles upside down, and paint away! Again, make sure your brush strokes are consistent the whole way around the bottle. I had to do three coats of chalkboard paint in order to make it completely opaque, and make sure the previous coat is completely dry before you apply another one.
I love how the chalkboard paint looks on the bottles, especially next to the gold dipped ones! This would be really cute to hold things that you could label with chalk. I also think they would look really cool with bright daisies in them!
Well there you go! DIY gold dipped and chalkboard painted milk bottles for you or your friends! This was a really simple project that only took a couple of hours (I made sure the coats had plenty of time to dry between paintings), and wasn’t too expensive at all! I had plenty of leftover paint after these bottles, and the possibilities for the Liquid Leaf and chalkboard paints are endless! I have a feeling everything I own is going to be either gold or chalkboard painted…
Have you been liking the gold dipped and chalkboard paint trend lately?

Thank you so much for reading, and I hope you have a great day! 🙂